Getting Started
Setting up BrightBlur takes a few minutes. Because it uses end-to-end encryption, there’s one extra step compared to a normal app — writing down your recovery phrase.
1. Create your account
Section titled “1. Create your account”Visit the registration page and pick how you’d like to sign in. Both options are first-class:
- Email and password — enter your email, name, and a strong password (at least 8 characters).
- Email and a passkey — enter your email and name and create a passkey instead of a password, for faster, passwordless login.

Either way you go straight on to setup. A verification email is sent in the background — clicking its link confirms your address, but you don’t need to do it before you start using BrightBlur.
2. Write down your recovery phrase
Section titled “2. Write down your recovery phrase”During setup, BrightBlur generates your encryption keys and shows you a 12-word recovery phrase.
You’ll be asked to confirm three random words from the phrase before you can continue. This ensures you’ve actually recorded it.
3. Share your first photo
Section titled “3. Share your first photo”There’s nothing to set up before sharing. When you upload a photo and tag the faces in it, BrightBlur pre-selects a sensible audience for you — your own circle, plus the circle of each person you tagged — so the photo reaches you and everyone connected to those people.
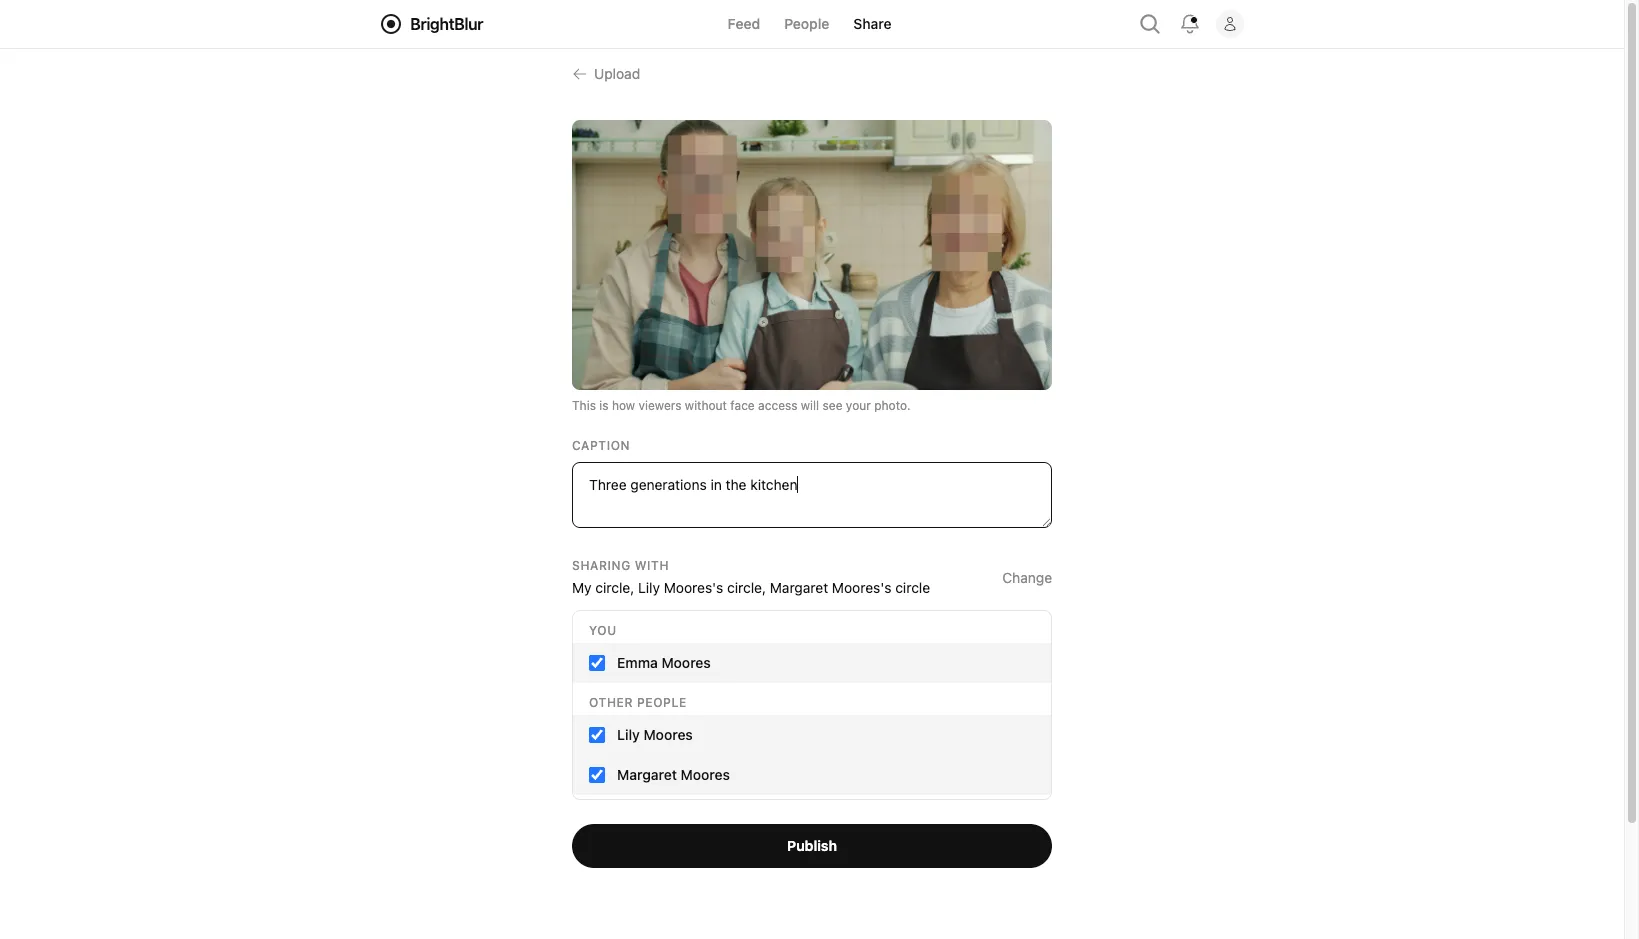
You can review and adjust that audience in the picker before publishing; at least one circle must be selected. To let someone see a person across your photos, open that person from the People page and invite them.