Uploading Photos
Uploading a photo on BrightBlur involves three stages: selecting the photo, deciding what happens to each face, and choosing your audience.
Step 1: select your photo
Section titled “Step 1: select your photo”Tap Upload in the navigation bar and choose a photo from your gallery, or take one with your camera. (To share several at once, use Share multiple photos — see Batch Upload.)
BrightBlur then detects faces automatically, on your device. You’ll see a brief “detecting” then “recognising” spinner. If it finds no faces, it shows a short warning so you can either Continue anyway or Try a different photo.
Step 2: decide what happens to each face
Section titled “Step 2: decide what happens to each face”You review faces one at a time. For each detected face you choose one of:
- Tag — assign the face to a person (search for an existing person, or + New person to create one inline). The face slice is encrypted to that person’s key, so only their controllers and the people you share the photo with can see it.
- Leave clear — “Everyone sees this”: the face stays visible to everyone who can see the photo. Use it for people who’ve consented to being shown, or for yourself.
- Skip (destroy) — “Face is gone forever”: the face is permanently pixelated for everyone, with the original pixels destroyed. This is irreversible.
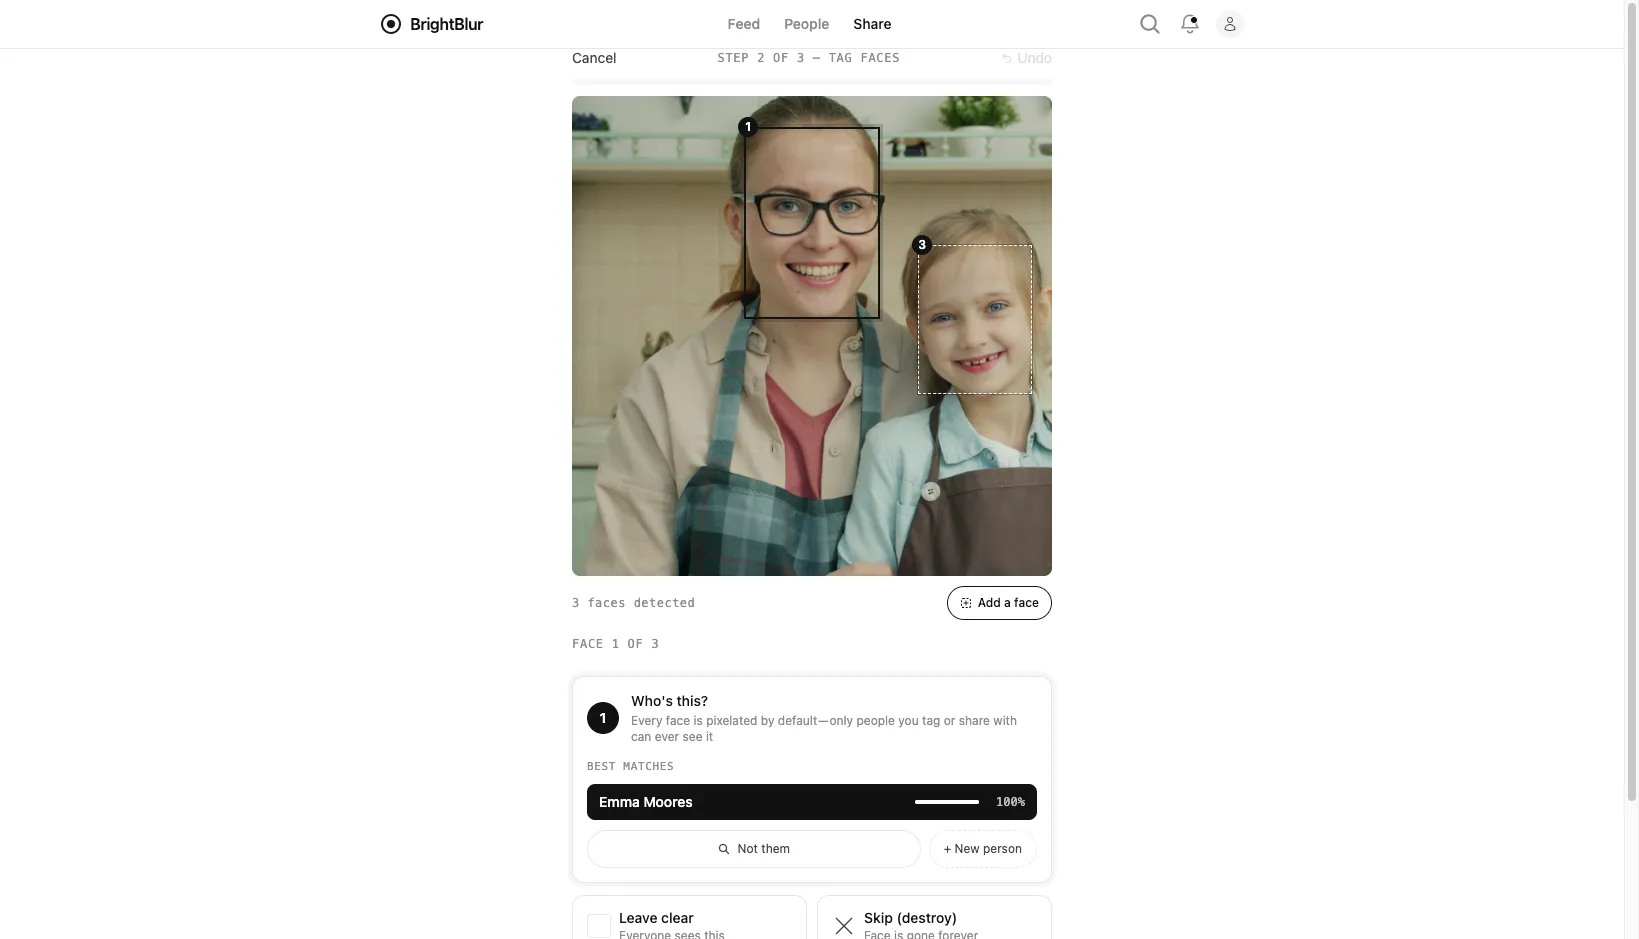
If the detector boxes something that isn’t a face, choose Not a face — remove to discard the box. If it misses a real face, tap Add a face to draw a box around it yourself.
Step 3: choose audience & caption
Section titled “Step 3: choose audience & caption”When you’ve reviewed the faces, tap Choose audience to move to the publish page. The audience is made up of circles — the person-groups you belong to — and BrightBlur pre-selects a sensible default: your own circle plus the circle of each person you tagged. Review or adjust it, and add an optional caption (which is encrypted too).
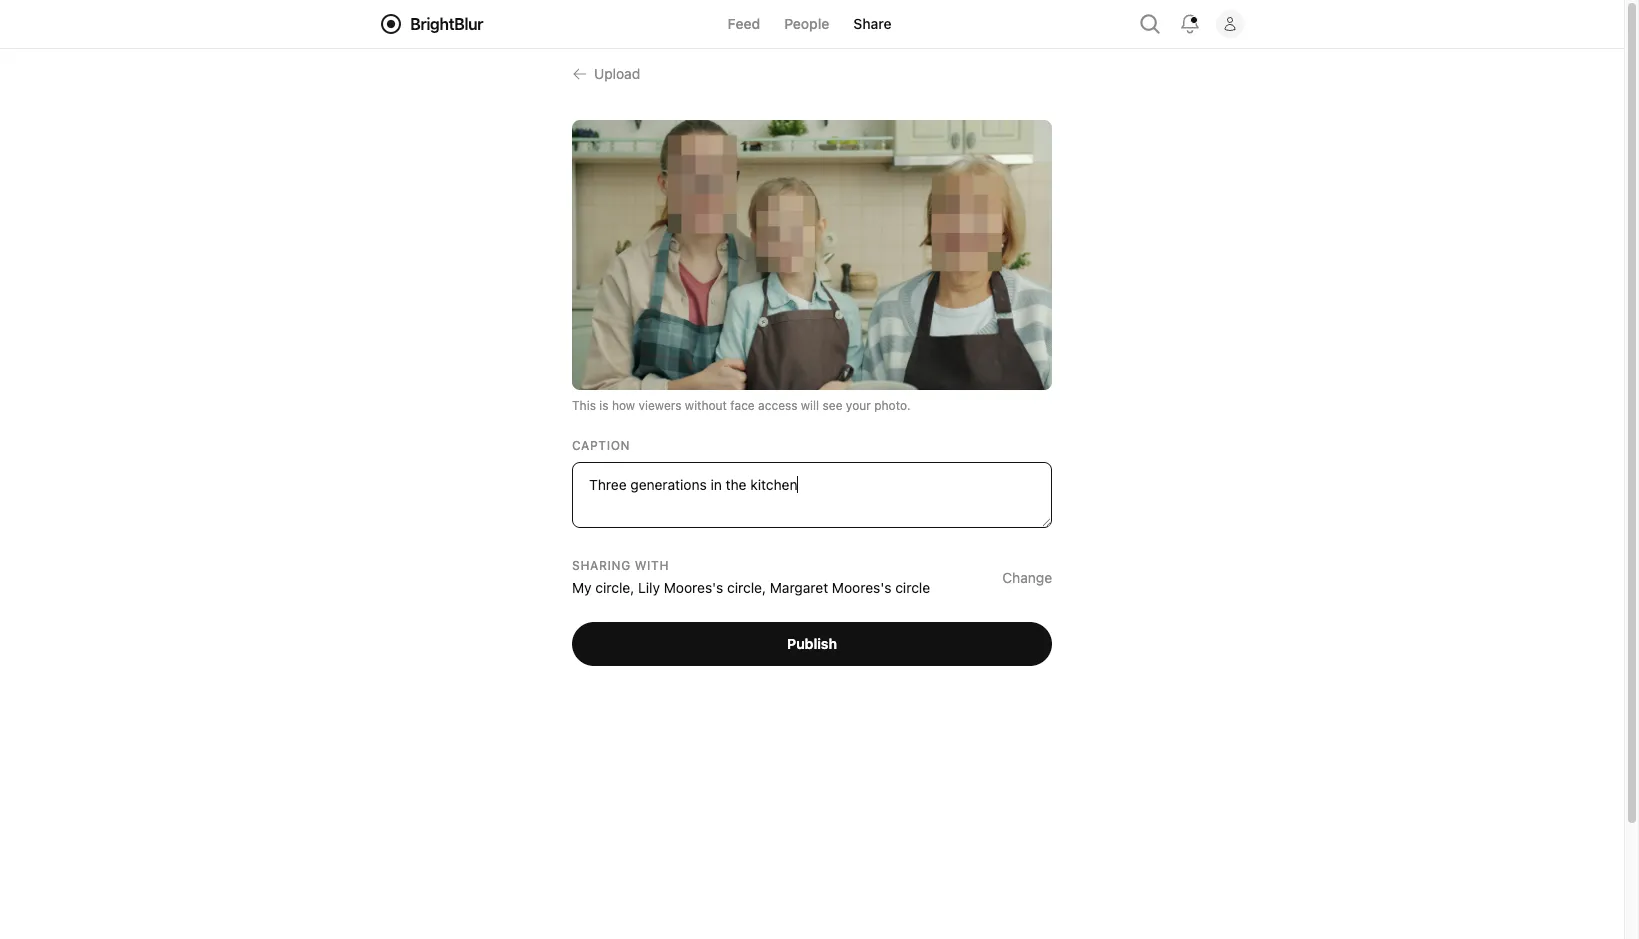
You’ll see a preview of the pixelated result before publishing. At least one circle must be selected. Once you’re happy, tap Publish — the photo is encrypted on your device and uploaded as encrypted data.